- Remove the Initial Grip
- Stick the Grip at the Very Bottom of the Racket
- Wrap Around With a Brief Overlap Until Finished
Your Guide
 Gavin Davison
Regripping a racket is a pretty important skill if you plan on playing tennis regularly.
And I must make a confession here – I didn’t learn to regrip my own rackets until I was about 15/16 YEARS OLD.
Until then, my father used to regrip my rackets for me, which isn’t something I’m overly proud of!
However, it’s actually amazing how many people still don’t know how to regrip a racket.
And until you learn, someone else will always need to do it for you, which is far from ideal.
This is especially true when you need to regrip a racket DURING A MATCH!
There is nothing more embarrassing than having to leave the court to ask someone to regrip a racket for you, TRUST ME.
With that said, of course, there are both replacements and overgrips that you can use.
But regardless of which type of grip you use, the method for regripping them remains the same.
Below, I’d like to highlight exactly how you can regrip your racket from start to finish.
So let’s get started.
Regripping Your Racket – Step by Step
Once you have regripped a fair few rackets in your time, you will usually be able to do this in around a minute or two.
Like anything, it just takes an INITIAL UNDERSTANDING of how to do it and then a boatload of practice.
But the first element is what I’ll be focusing on here, starting with the very first thing you must do:
1) Removing the Grip on Your Racket
People don’t regrip their rackets just for the FUN OF IT!
The main reason for regripping your racket is because the one you are currently using is either worn out or you just don’t like it.
So on that note, the first thing you need to do is to remove the current grip on your racket.
This is actually the easiest part of the regripping process.
All you need to do is tear off the tape attaching your grip to the handle (should be at the top of the handle) and then unwind the grip.
The one and only exception to this is if you are simply putting an overgrip over the top of your current grip.
But in the vast majority of cases, you will want to remove the current grip before you go and put on THE NEW ONE.
Make sure you discard all parts of the previous grip, including any parts of the grip that stick to the handle, as these can make the new grip somewhat BUMPY and UNCOMFORTABLE.
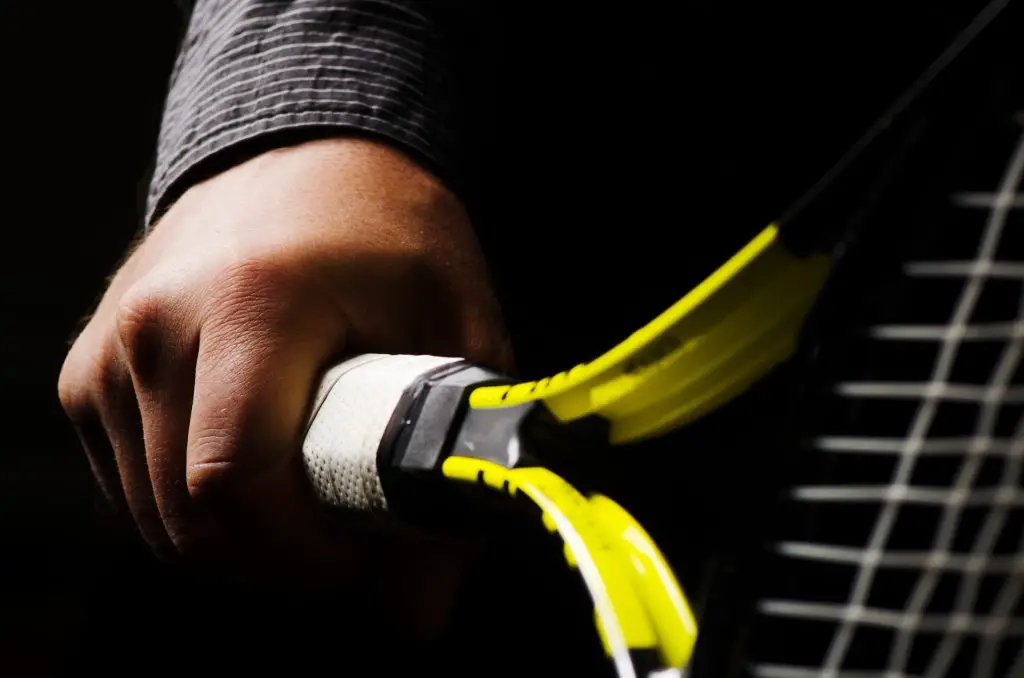
2) Attaching Your New Grip to the Bottom of the Handle
Once the previous grip has been removed from your racket, it’s time to start putting on your new one.
All grips come with two main parts of extra packaging you’ll need to take care of first.
The first of these is the plastic wrapping that coats the grip to maintain that STICKY FEEL.
This must be removed, and then you’ll see a small sticky tape on the inside of the grip.
You must remove this as well, as this is the part of the grip that you use to stick to the handle to begin regripping it.
And as it happens, this is the very first thing that you need to do.
Make sure that you stick the grip to the very bottom of the handle, leaving no parts of the previous grip or handle exposed.
Personally, I like to let the grip hang over the bottom of the handle slightly, as I find it more comfortable.
But with that said, this is all a matter of personal preference.
3) Wrapping the Grip Around
Starting the wrap around is the most delicate and difficult part of regripping your racket.
In this stage, I recommend stretching the grip as much as possible, without tearing it, of course.
That’s because it helps to ensure that the grip fits tightly around the handle, removing any annoying bumps or gaps in the grip when finished.
Keeping THIS PRESSURE, you can start to wrap the grip around the handle, trying to very slightly overlap the grip on each turn of the handle.
The overlap should be no more than a fingernail’s length, as anything more might mean that you run out of material as you get to the top of the handle.
This actually presents an interesting decision.
If you have a two-handed backhand, you must regrip the racket and cover the entire handle.
But if you have a one-handed backhand, this isn’t strictly necessary.
Check out how Richard Gasquet does his racket regrip to see what I mean:
As you’ll see in the video, he only regrips half of the handle, as that’s the only bit of the grip that he uses.
Bonus – Making Sure You’ve Done It Correctly
Before you actually put the sticky tape on top of the grip when finished, you might want to take a moment to investigate the job you’ve done.
While keeping the pressure on the grip, you can look back to ensure that the overlap is consistent all the way up the grip.
If there are any gaps or inconsistencies, you can simply unwrap the grip to that point and correct it.
That’s why I recommend that you don’t put the sticky tape on the grip prior to checking out the job that you’ve done.
But once you are satisfied that you’ve done things correctly, you can then stick the tape on and finish things off.
You’ll also notice that your racket has a small rubber tag at the top of the handle.
I like to slide this down to cover the sticky tape used to attach the grip to the handle.
This ensures that the sticky tape won’t peel off, and from an AESTHETICS POINT OF VIEW, I think it looks better – not that this really matters!
Let me know if these tips help you to regrip your racket correctly in the comments!