- Cut the Strings Out
- Complete Your Measurements
- Learn the String Pattern and Proceed
Your Guide
 Gavin Davison
If you watch someone string a tennis racket for the first time, things can seem a little confusing.
Believe me, I know!
The first time I watched my brother string one of my tennis rackets, it was like a man discovering fire.
This is no exaggeration!
But once I actually learned, step-by-step how to do this, I realized that things are actually PRETTY STRAIGHTFORWARD.
I guess it’s like anything – once you have learned the steps and done it for yourself, it certainly doesn’t seem too confusing anymore.
And while each tennis racket is somewhat different, the process for stringing the racket remains pretty much the same.
As you can see from the information above, the first thing you need to do is cut the strings up.
The second step is where you can make your measurements, and these are different depending on whether you are stinging in one piece or two pieces, and the string pattern can also ADJUST THIS TOO.
Don’t worry, I will explain all about this later.
Finally, which is pretty much the most important part of the process, you need to learn what the string pattern is for the racket you are stringing.
While every racket will tell you what the string pattern is somewhere on the frame, you still need to look at which holes to put the string through.
By the end of this piece, I am confident that you will have a much better idea of how to string your first tennis racket.
However, I’d recommend checking out this video for visual aid, in addition to reading through the information below:
Stringing Your First Tennis Racket – Step by Step Guide
Of course, if you are stringing a tennis racket, you need to actually have a machine in which to do this.
There are many stringing machines available for purchase these days, with electric stringing machines ranking as the very best.
However, these do come at a cost.
So if you want to save a bit of money but still grab a decent machine, you may want to consider a crank or drop weight machine.
I actually prefer crank machines as they are easy to transport and I find them very quick when stringing, but this is all a matter of PERSONAL PREFERENCE.
With that out of the way, let me jump into this tennis racket stringing guide.
STEP 1: Removing the Strings
Removing the strings on your tennis racket is the easy part.
You will need some clippers in order to cut through each string in the racket, and these should come with the machine once you purchase one.
You need to cut through all of the main strings and all of the cross strings, and then weave your fingers through them to ensure that they are not tangled anymore.
After this, you can simply start pulling them out one by one.
Even if you have only broken one string in the mains or the crosses, I always recommend restringing the entire racket.
Not only can it be a pain to try and remove just one section of strings if you have snapped one, but it can also be very time-consuming.
In addition to this, the more you play with a racket the more your strings will lose tension.
Therefore, the best way to get a fresh racket is to string the entire thing.
STEP 2: Making the Measurements
This is a very important part of the process, so make sure you are zoned in for this one!
If you recall what I mentioned earlier, you can string a racket in one piece or two pieces.
If you are stringing in one piece, once you have actually put the racket on the machine to string it, I generally measure around 17 to 18 lengths of the entire racket.
This is easy to do once you have got the racket placed on the machine.
With that said, make sure you have a look at the string pattern to see whether you may need more or less string.
This video should also help you out:
For example, if you are stringing a racket with an 18 x 20 string pattern, this will need 18 lengths at least if you are stringing it in one piece.
But if you are stringing a racket with a 16 x 18 pattern, this will require less string.
The more you get used to stringing a certain racket, the easier it becomes to make these measurements.
But what about if you are stringing in two pieces?
This is done if you are attempting to perform a HYBRID JOB for your racket.
A hybrid in this sense means that you use a different string in the mains than the crosses.
However, I often string in two pieces even if I’m using the same string.
I find that the tension is more accurate this way, and I also find it easier to string rackets in two pieces in general.
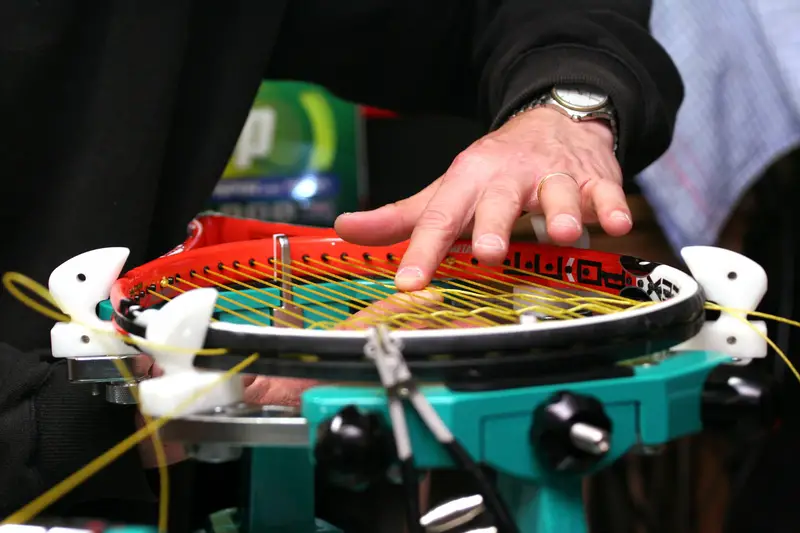
STEP 3: Learn the Pattern and Go
So now that you’ve chopped the strings out, placed the racket on the machine, and made your measurements, it’s time to learn the pattern and START STRINGING.
You will always start stringing with the mains in a racket.
And to clear up something that people get confused about, whether you start from the top or the bottom depends on the available holes on the throat of the racket.
If you see six holes, you will start from the bottom.
But if you see eight holes, you will start from the top!
Keep that in mind when stringing, as it will save you plenty of time in the form of avoiding mistakes and needing to restart.
And when it comes to the crosses, the way that you string a racket is to weave under and over AS YOU GO ALONG.
Just take a look at any strung racket and you will see what I mean.
Make sure you take your time with this process, especially if you are brand new to stringing.
Mistakes of weaving under or over more than once are pretty common, and this can mess up the string job if you are not careful.
Finally – when it’s time to tie off the racket, just make a quick loop and pull the remaining string through.
Make sure you tension it and then cut off the remaining string.
And voila, you have just strung a racket for the first time!
Has this made you feel more comfortable with stringing a tennis racket? Let us know in the comments.